
How to Choose the Right Bone Filling Container?
Choosing the right Bone Filling Container is a clinical decision, not a simple packaging purchase. The container must protect the graft, support sterile handling, and fit the actual procedure.
Dr. Robert E. Marx, a respected oral and maxillofacial surgeon, emphasizes, “The container must protect the graft and support the clinician.” This principle is easy to overlook. A container may appear clean and convenient, yet still create problems during preparation. Its opening may be too narrow. Its walls may flex under pressure. Its label may become unreadable when exposed to moisture.
A reliable Bone Filling Container should match the graft material, filling volume, and delivery technique. Consider medical-grade materials, secure closure, sterilization compatibility, and clear lot traceability. The internal surface should release the graft smoothly. Sharp edges and unnecessary grooves deserve attention.
Small details matter.
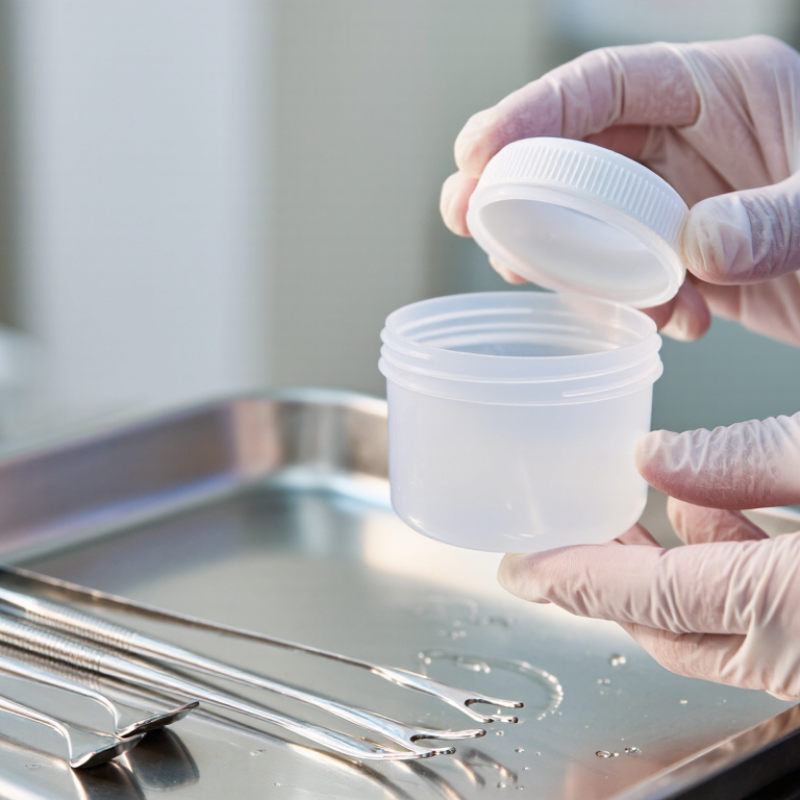
Clinical staff should test the container with gloved hands before routine use. Can it be opened without awkward force? Does it remain stable on a wet tray? Can the contents be transferred without excessive waste? These practical observations reveal weaknesses that product brochures may not mention.
No container is perfect. A larger model may improve loading but occupy valuable workspace. A smaller model may reduce waste but limit handling. That trade-off requires honest review.
Always check the manufacturer’s instructions, validation data, and applicable medical-device requirements. Independent clinical judgment remains essential. The best choice is the container that protects material integrity, reduces handling uncertainty, and supports consistent patient care.
Understanding Bone Filling Containers and Their Clinical Purpose
A bone filling container is more than a small sterile cup. It supports the safe preparation, transfer, and placement of bone graft material during a procedure. Its clinical purpose is simple: keep the material contained, visible, and ready for controlled handling. In the operating room, staff may need to wet, mix, or portion graft material. The container should support these steps without spilling or trapping material in corners. Small details matter.
Selection starts with the expected graft volume and handling technique. An oversized container may make small quantities difficult to manipulate. A narrow container can limit access to instruments or gloved fingers. Clear walls may help clinicians inspect texture, moisture, and remaining volume. A stable base reduces accidental tipping on a crowded sterile field. The material should tolerate the intended fluids and preparation method. Sterile packaging, secure closure, labeling space, and lot traceability also deserve attention. These features support a reliable workflow, but they do not replace clinical protocols.
A practical review should include the actual procedure, not only a specification sheet. Ask whether the container opens easily, stays stable, and releases graft material completely. Check whether the lid interferes with forceps or mixing tools. It is easy to focus on capacity and overlook visibility or residual material. That oversight can waste graft and interrupt timing. No container solves every handling problem. Selection may need revision after staff feedback, simulated use, or an observed near-spill.
Identifying the Container Type for the Bone Material
How to Choose the Right Bone Filling Container?
Identifying the container type starts with the bone material, not the label. Granules need a wide-mouth sterile cup or flexible pouch. This allows controlled scooping without crushing particles. Putty usually fits a syringe or narrow applicator. Blocks require a rigid tray with enough clearance for inspection and removal. A perfect container does not exist.
The 2024 American Joint Replacement Registry Annual Report includes more than 3.2 million procedure records. This scale reflects how often surgical teams manage different defect sizes and material formats. The 2023 WHO Global Status Report on Road Safety reports about 1.19 million road deaths yearly. Trauma cases can therefore demand rapid handling and varied container capacities. Choose a container that protects sterility, limits moisture exposure, and supports clean transfer. Check the inner surface too. Rough edges may trap granules. Transparent walls help confirm fill volume, although glare can mislead visual checks. I still see teams focus on capacity alone. That is an incomplete decision.
For injectable materials, verify plunger compatibility and resistance to deformation. For porous blocks, prevent compression during storage and transport. Review the material’s instructions, validated packaging data, and operating-room workflow together. ISO 10993-1 also supports biological safety evaluation for patient-contacting materials. The container should match the material’s handling behavior, not merely its advertised size.
How to Choose the Right Bone Filling Container?
Identifying the Container Type for the Bone Material
This decision-oriented comparison uses a 1–5 rating scale, where 5 indicates a stronger general material characteristic. Glass provides excellent moisture and chemical barrier performance, while HDPE and polypropylene offer good impact resistance. Clear containers provide limited light protection unless an opaque or amber format is selected. Final packaging selection should be confirmed through sterilization compatibility, seal integrity, stability testing, and applicable medical-device requirements.
Assessing Material Safety, Sterility, and Compatibility
How to Choose the Right Bone Filling Container?
Bone filling containers should be assessed through material safety, sterility, and clinical compatibility. Material safety begins with clear documentation. Look for medical-grade materials, biocompatibility testing, and controlled manufacturing records. Review information about extractables and leachables, especially when the filling material contacts the container for extended periods. A low-odor polymer may still release unwanted substances. Do not rely on appearance alone. Ask for validation data and storage-condition limits.
Sterility requires more than a sealed pouch. Confirm the sterilization method and its suitability for the container material. Inspect packaging for punctures, weak seals, moisture, or damaged corners. Small defects matter. Check the stated shelf life and storage instructions before use. Staff should record the lot number and inspection result. This supports traceability and helps identify recurring packaging problems. If the seal looks questionable, do not use it.
Compatibility also affects safe handling. Fine bone particles may cling to rough surfaces, while larger granules can resist smooth transfer paths. Moisture-sensitive materials need suitable barrier protection. Check the container size, opening, lid fit, and transfer method. A fitting lid is not enough. Test how easily the contents pour or are retrieved under realistic conditions. In practice, feedback from clinicians, sterile processing staff, and quality personnel can reveal overlooked problems. No container is perfect. Reassess the choice when evidence is incomplete, rather than trusting attractive claims.
Comparing Capacity, Handling, and Application Features
How to Choose the Right Bone Filling Container?
Capacity should match the planned procedure, not the largest available volume. A container that is too small may require repeated refilling and increase handling time. A container that is too large may expose unused material to unnecessary manipulation. Small details matter. Measure the expected graft volume, then allow limited working space for mixing or transfer. Graduated markings can support accurate preparation, but they should remain clear after sterilization or routine cleaning.
Handling features directly affect consistency and safety. A stable base helps prevent tipping on a crowded procedure tray. Wide openings can simplify filling, while secure lids reduce accidental spills during movement. Some procedures benefit from a shallow shape because instruments can reach the material easily. Others need a deeper container to reduce scatter. Grip texture also matters when gloves are wet. These points sound basic, yet they are easy to overlook.
Application features should reflect the material and technique. Smooth internal surfaces may reduce residue and make inspection easier. A compatible applicator can support controlled placement into a confined site. If the container is transparent, staff can check remaining volume without opening it repeatedly. However, transparency alone does not prove suitability. Confirm material compatibility, sterility requirements, closure integrity, and validated cleaning or disposal procedures. A useful evaluation records handling time, leftover material, and operator feedback. The first choice may still need revision after real clinical use.
Selecting a Container Based on Procedure and Storage Needs
How to Choose the Right Bone Filling Container?
Selecting a container begins with the procedure, not its appearance. A dental socket, spinal site, and orthopedic defect may require different handling conditions. Match the container volume to the planned graft amount. Too much empty space can increase movement during transport. Too little space may compromise aseptic handling.
For procedures lasting only a few minutes, an easy-open sterile container can support efficient preparation. A secure closure becomes more important when materials move between preparation and treatment areas. Check whether the container suits the graft material, instruments, and intended use. Some materials need moisture control, while others require dry storage. Follow the storage temperature and time limits provided by the supplier and your facility’s validated protocol. That detail matters.
Label visibility also affects reliability. Record the material type, lot information, preparation time, and expiry details where required. Choose a container that keeps these markings readable after handling. Experienced clinical teams often assess grip, lid security, and transfer speed during routine simulations. Small errors happen. A lid may be difficult to open with wet gloves, or a label may peel from condensation. These issues deserve review before clinical use. Staff training, documented checks, and consistent storage practice help reduce preventable contamination and material loss. When uncertainty remains, consult the responsible clinician, infection-control professional, or supplier’s technical documentation.
How to Choose the Right Bone Filling Container? - Selecting a Container Based on Procedure and Storage Needs
| Procedure or Use Case | Recommended Container Type | Typical Capacity | Important Design Features | Storage Considerations | Selection Notes |
|---|---|---|---|---|---|
| Small dental or periodontal defect | Single-use sterile vial or small syringe | Approximately 0.5–2 mL | Narrow opening, controlled dispensing, tamper-evident closure, and clear volume markings | Keep sealed until use and store according to the graft material’s labeled temperature and humidity requirements | Choose a compact format that minimizes material waste and allows accurate delivery into a confined defect |
| Socket preservation or localized oral surgery | Sterile vial, cup, or dispensing syringe | Approximately 1–5 mL | Wide enough opening for easy access, stable base, sterile barrier, and low-particle-shedding materials | Avoid exposure to moisture, direct sunlight, and unnecessary temperature changes | A wide-mouth container is generally easier to access with a sterile spatula or surgical instrument |
| Guided bone regeneration or moderate defect filling | Sterile wide-mouth vial or rigid cup | Approximately 2–10 mL | Rigid walls, broad access opening, secure closure, readable labeling area, and compatibility with sterile handling | Use the original sealed package for storage; do not return unused material to the container after opening | Select enough headspace for instrument access without making the container unnecessarily large |
| Large orthopedic or maxillofacial defect | Larger sterile jar, tray, or multi-container pack | Approximately 10–50 mL or more | Stable base, wide opening, secure lid, strong package integrity, and sufficient labeling space | Confirm storage temperature, humidity limits, expiry date, and package integrity before use | Several smaller containers may improve dose control and reduce the risk of contaminating the full quantity |
| Moist or hydrated graft material | Leak-resistant sterile cup, syringe, or sealed pouch | Procedure-dependent; commonly 1–20 mL | Liquid-tight closure, compatible contact surface, secure seal, and controlled dispensing | Maintain the specified temperature range and prevent leakage, evaporation, or accidental opening | The container must be validated for contact with the formulation and any included liquid component |
| Dry particulate or granulated material | Moisture-protective vial, bottle, or sealed pouch | Approximately 1–50 mL | Moisture barrier, secure seal, low-shedding closure, and clear fill or dosage information | Store in a dry environment and protect from humidity until the package is opened | Choose packaging with an effective moisture barrier when the material is sensitive to humidity |
| Material requiring cold-chain storage | Validated sterile container placed in qualified secondary packaging | Based on the required clinical dose | Secure primary closure, temperature-sensitive labeling, protective secondary packaging, and traceability features | Maintain the labeled temperature range during storage and transport; monitor excursions when required | The container alone does not provide cold-chain control; the complete packaging and transport system must be qualified |
| Operating-room preparation and short-term handling | Sterile tray, bowl, or openable cup used within the sterile field | Approximately 5–100 mL | Stable geometry, easy instrument access, smooth surfaces, and clearly defined sterile opening method | Use promptly after opening and follow the material’s instructions for maximum allowable exposure time | Prioritize handling efficiency and contamination control rather than long-term resealing |
| Long-term unopened storage | Validated sterile primary container with sealed secondary packaging | Any clinically appropriate volume | Sterile barrier, tamper evidence, lot identification, expiry information, and package integrity | Follow the labeled storage conditions and rotate stock using a first-expire, first-out system | Do not use a container if the seal is broken, the package is damaged, or the expiry date has passed |
Selection should always be confirmed against the graft material’s instructions for use, validated sterilization method, required storage conditions, and applicable medical-device packaging requirements.
Article Source:
We Meet Our Clients Needs.
Meeting the diverse needs of our clients, we have complete machining facilities for everything from single part prototypes to large quantity production. Our small size is one of our biggest assets. It allows us to control costs and maintain the highest of standards.
Quality orientated and delivery always on time or earlier than originally promised.
Strongly recommend MSD.